closeup duckweed plant

Duckweed: The Fast-Growing Food Source

Don’t overlook this as a food source—many fish benefit from eating plants and algae. This particular plant grows rapidly enough to support a harvest-by-eating method.

With sufficient light, a small culture of this plant can cover the surface of a tank in just a couple of weeks. We usually provide enough to comfortably cover a 5-gallon tank. If you’re raising fish that enjoy nibbling on plant material, like some Rift Lake Cichlids or Goldfish, you might notice them feasting on the trailing roots until they’re nearly gone. But don’t worry—the roots typically regrow within a few days.

At the hatchery, we cultivate several types of duckweed, but the variety most favored by fish is a small, fast-growing one that thrives under a range of conditions—none of which need to be perfect. The main challenge with this plant is its ability to quickly outgrow any demand. Additionally, when it covers the water’s surface, it can give fruit flies and springtails a chance to escape the water, which isn’t ideal.

Beyond being a nutritious food source for certain fish, this plant also provides a habitat for livebearer fry and offers shade for light-sensitive species.

vinegar-eels

Vinegar Eels: The Simple, Long-Lasting Live Food for Delicate Fry

Ideal Uses for Vinegar Eels:

  • Betta fry when newly hatched
  • Corydoras fry when newly hatched
  • Apistogramma fry at free swimming stage
  • Killifish fry when newly hatched
  • Gourami fry from newly hatched to 1/4 inch
  • Fry too small for microworms or baby brine shrimp
  • Harvesting vinegar eels

Why Choose Vinegar Eels?

Vinegar eels are an excellent choice for feeding small fry because they can survive in water for days, unlike many other live foods that die within hours. They are a great transitional food from greenwater and infusoria to baby brine shrimp and microworms. Their ability to stay suspended in the water column makes them more accessible to fry compared to microworms, which tend to sink and settle at the bottom.

Easy Culturing Instructions:

  1. Container: Use a one-gallon milk jug or vinegar jug, though smaller containers work too (with reduced production).
  2. Culture Medium:
    • Place half an apple in the container.
    • Fill the container 1/3 full with tap water (no need to dechlorinate).
    • Add apple cider vinegar until the liquid reaches halfway up the container’s taper (about a 1:1 ratio with water).
  3. Wait Time: The culture will be ready in about a month, so plan ahead.

Harvesting Vinegar Eels:

  1. Simple Harvest Method:
    • Use a small baster to transfer some eel-laden liquid into a funnel with a coffee filter.
    • Let the liquid drain back into the culture, then rinse the eels in the filter with cold water.
    • Swish the inverted filter in a cup or beaker of water to release the eels, then use an eyedropper to feed the fry.

Vinegar eels are easy to culture and an excellent food source for small fish fry and larvae. If you have any questions about vinegar eels, feel free to ask!

microworms

Microworms: The Essential Live Food for Small Fry and Larvae

Ideal Uses for Microworms:

  • Betta fry up to 1/4 inch
  • Corydoras fry and sub-adults up to 3/4 inch
  • Larval newts and salamanders
  • Frog tadpoles
  • Apistogramma fry up to 1/4 inch
  • Killifish fry up to 1/2 inch
  • Gourami fry up to 1/4 inch
  • Guppy fry up to 1/4 inch
  • Most fry until they’re ready for Grindal worms

Curious about Microworms? Ask us for more details!

What Are Microworms?

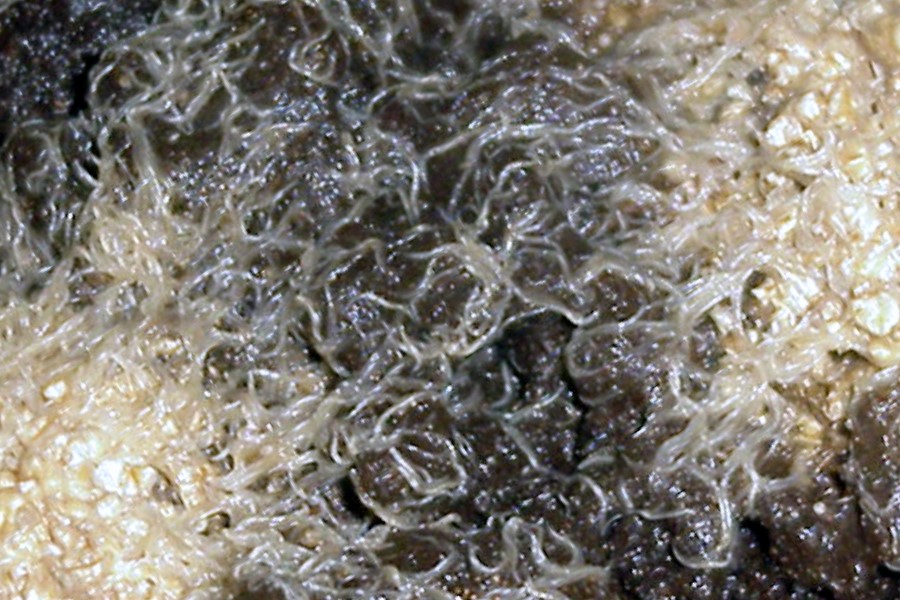
Microworms are not actually worms but nematodes from the species Panagrellus. They are slightly smaller than baby brine shrimp and highly prolific. While some argue that microworms may not be as nutritious as brine shrimp, they are still an excellent option, especially for fry that are too small to consume baby brine shrimp.

Why Choose Microworms?

With the rising and unpredictable costs of brine shrimp cysts, many aquarists have turned to microworms as an affordable and effective alternative. Microworms offer good nutritional value and come with some added benefits, making them a practical choice for many hobbyists.

Culturing Microworms

There are many methods for culturing microworms, each with varying results. Based on our experience, here’s a simple and effective way to start:

  1. Prepare the Culture: Cook a batch of regular, unsalted oatmeal according to the package instructions, but make it slightly thicker by adding more cereal and cooking it for an extra 15 seconds in the microwave. Once cooked, spread about 1/2 inch of the oatmeal mixture on the bottom of a butter tub and let it cool to room temperature.
  2. Inoculate the Culture: Punch a couple of small nail holes in the lid of the container to allow airflow, though the worms may eventually clog them. Once the oatmeal has cooled, sprinkle a small pinch of active yeast (like Fleischmann’s) on top—just enough to kickstart the process. Then, add a portion of your microworm starter by placing a spoonful onto the oatmeal.
  3. Wait and Harvest: Within a few days, you should see parts of the mix become glistening and slightly fluid-like—that’s the worms wiggling. After about a week, the culture will be ready to harvest.

Harvesting Microworms

To harvest, simply scrape the worms off the sides of the container with a dull knife. Swish the collected worms into a beaker with an inch of water, and you’ll see the water cloud up with millions of tiny worms. Use an eyedropper to feed the worms directly to your fry.

Microworms are easy to culture and provide a reliable, nutritious food source for small fry and larvae. With minimal effort, you can ensure your fry get the food they need to thrive.

baby-brine-shrimp

Baby Brine Shrimp: The Gold Standard for Feeding Aquatic Fry

Suggested Uses:

  • Betta from hatching to sub-adult
  • Corydoras from fry to 1/2 inch sub-adults
  • Newts and Salamanders
  • Apistogramma fry to 1/2 inch
  • Killifish from fry through adult
  • Gourami from 1/4 inch through adult
  • Guppy and other livebearer fry through adult

Interested in learning more about brine shrimp? Ask us!

Brine Shrimp: An Essential Food for Aquatic Larvae

Brine shrimp are an exceptional food source for various aquatic larvae, including fish, newts, salamanders, frogs, and even shrimp. Newly hatched brine shrimp, or nauplii, provide critical nutrition during the early stages of development. However, some species, like Corydoras, may benefit more from alternatives such as microworms, which sink to the bottom where catfish fry swim, or vinegar eels, which are smaller and better suited for fish with tiny mouths.

Maximizing Nutritional Value

Brine shrimp nauplii have a narrow window of peak nutritional value, typically within 8 hours of hatching. Beyond this period, they start to lose their nutritional benefits as they use up their stored energy for growth. Feeding the nauplii within this timeframe ensures that your larvae receive the maximum benefit. Additionally, since brine shrimp are saltwater creatures introduced into a freshwater environment, uneaten shrimp may quickly lose their nutritional value or die, so frequent and small feedings are recommended.

Practical Considerations

While brine shrimp are invaluable in most hatcheries, they require timely management. If you’re new to aquaculture or find that managing a brine shrimp hatchery doesn’t suit your schedule, consider alternatives like microworms or vinegar eels, which may be easier to handle and less time-sensitive.

Our Brine Shrimp Hatchery Setup

We use a simple, effective setup for hatching brine shrimp, consisting of four one-liter water bottles, a heater to maintain 78°F, and a rotation system that ensures a continuous supply of freshly hatched nauplii. Each bottle is marked to indicate the stage of development—12 hours, 24 hours, and harvest. This method allows us to harvest and feed shrimp on a 12-hour cycle, providing a steady supply of live food for our fry.

Tips for Success

  • Proper Timing: Harvest shrimp within 8 hours of hatching for maximum nutrition.
  • Air Circulation: Ensure air tubes are fully submerged to circulate eggs properly.
  • Flexible Feeding: Adapt your feeding schedule based on the development stage and environmental factors like temperature.

Beyond Brine Shrimp

As your fish and newts grow, they will eventually outgrow brine shrimp. Preparing for this transition early can save time and resources. Consider introducing Grindal worms, which offer a nutrient-rich alternative and can be easily cultured at home. While not a natural food source for all species, Grindal worms can be “gut-loaded” to enhance their nutritional value, making them an excellent follow-up to brine shrimp.

daphnia

Daphnia Culturing: The Ultimate Live Food for Growing Fish Fry

Best Uses for Daphnia:

  • Betta fry from 1/2 inch
  • Newt and salamander larvae
  • Killifish fry from 1/2 inch
  • Conditioning fish for spawning
  • Guppy sub-adults and adults
  • Fish up to 3 inches

Why Choose Daphnia?

Daphnia, often called water fleas due to their jerky swimming, are incredibly easy to culture. Most daphnia are female and give birth to live young regularly if they have enough food. Daphnia are sensitive to chlorine and heavy metals, so be mindful of water quality when culturing them.

We cultivate two main species—Daphnia magna and Daphnia pulex—as well as a related species called Moina (sometimes known as “Russian Daphnia”). Magna is larger but requires more resources and time to grow, while Moina is smaller, heat-resistant, and prolific, making it a good option in hot climates. However, Pulex is our favorite due to its appropriate size, ease of cultivation, and year-round availability.

Culturing Daphnia:

  1. Container: Use anything from quart jars to 25-gallon tubs. Larger containers stabilize the environment, making them easier to manage.
  2. Water: Use aged tap water, pond water, or water from an established aquarium. If using tap water, ensure it’s free of chlorine and heavy metals. For outdoor cultures, we rely on green water (algae-rich water) to sustain the daphnia.
  3. Starting the Culture: Fill the container halfway with water, add your daphnia culture, and gradually fill it over several days as the colony grows. Acclimate the daphnia slowly to avoid shock.
  4. Feeding: Daphnia are filter feeders that thrive on green water. If green water isn’t available, alternatives like Liquifry or yeast-water mixtures can be used. Add the food sparingly—enough to create a slight haze in the water without turning it milky.

Harvesting Daphnia:

We recommend daily harvesting to keep the culture healthy. Use a net to remove about half the water, then refill with green water. Regular harvesting also helps monitor the culture’s health, ensuring it stays productive.

Additional Tips:

  • Monitor the culture frequently. If the environment becomes unfavorable, daphnia will start producing male offspring and ephippial (winter) eggs, which won’t hatch until exposed to cold cycles.
  • Consider alternative live foods like Grindal worms if you lack the space or facilities to grow daphnia. Grindal worms can be cultivated indoors in small plastic boxes and are a great supplement to daphnia.

Daphnia are a versatile and nutritious food source for a wide range of fish and larvae. With a little attention to water quality and feeding, they can be a reliable part of your live food repertoire.

springtails

The Ultimate Guide to Cultivating Springtail Cultures for Your Pets

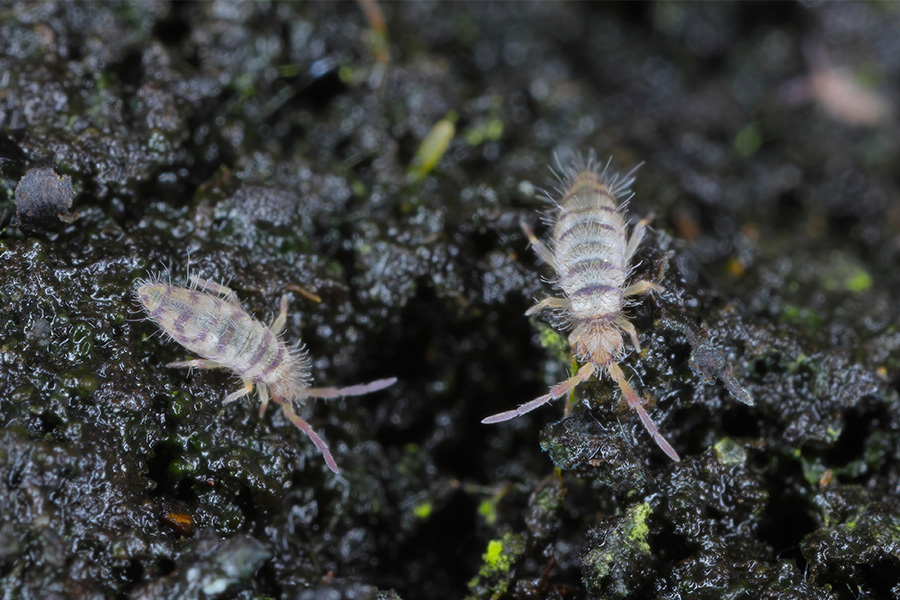
In the realm of live food cultures, springtails emerge as unsung heroes, offering a plethora of benefits for both the ecosystem and pet enthusiasts. These tiny, soil-dwelling creatures, known scientifically as Collembola, are more than just a food source; they are vital players in the decomposition process, aiding in nutrient recycling and soil health.

For pet owners, especially those with reptiles, amphibians, or fish, cultivating a springtail culture provides a sustainable and nutritious food option that mimics the natural diet of many pets. This comprehensive guide will walk you through the essentials of starting, maintaining, and utilizing a thriving springtail culture.

Understanding Springtails

Springtails are minuscule, often less than 6mm in length, and thrive in moist environments rich in organic matter. Despite their small size, their role in the ecosystem is monumental. They break down decaying plant material, contributing to the nutrient cycle and supporting healthy soil ecosystems. For pets, they offer a high-protein snack that encourages natural hunting and foraging behaviors.

Why Cultivate Springtails?

Springtail cultures are invaluable for owners of vivariums and terrariums, serving as a clean-up crew that helps manage waste and prevent mold growth. Additionally, they are an excellent source of live food for small amphibians, reptiles, and fish, promoting natural feeding behaviors and providing essential nutrients.

Preparing for Your Springtail Culture

Materials Needed

To start your culture, you’ll need a shallow container with a lid, a substrate (such as charcoal, soil, or coconut coir), distilled water for moisture, and a springtail starter culture. These supplies are readily available at most pet or garden stores or online.

Choosing the Right Environment

Select a location that maintains a consistent temperature and humidity level suitable for springtail growth, typically between 70-80°F with high humidity. Avoid direct sunlight and extreme temperature fluctuations to ensure a stable environment for your culture.

Setting Up Your Springtail Culture

Step-by-Step Setup Guide

  1. Prepare the Container: Fill your container with the chosen substrate to a depth of about 2 inches.
  2. Moisten the Substrate: Use distilled water to dampen the substrate, ensuring it is moist but not waterlogged.
  3. Introduce Springtails: Add your starter culture to the container, gently spreading them over the surface of the substrate.

Introducing Springtails to the Culture

Once added, cover the container with its lid to maintain humidity but ensure there are small air holes for ventilation. Place the container in your chosen location, and you’re all set!

Maintaining Your Springtail Culture

Feeding Your Springtails

Springtails feed on microscopic fungi that grow on decaying plant matter. Feed them rice flour, yeast, or vegetable scraps, sprinkling the food lightly over the substrate every few weeks.

Moisture and Humidity Management

Check the moisture level of your culture regularly, adding distilled water as needed to keep the substrate damp. Avoid overwatering, as excessive moisture can lead to mold growth and harm your culture.

Avoiding Common Pitfalls

To prevent mold, only feed as much as your springtails can consume in a few days. If you notice mold growth, reduce feeding and remove any visible mold. If the substrate dries out, gently rehydrate it without flooding the container.

Harvesting and Using Your Springtails

Harvesting Techniques

To harvest springtails, lightly mist one side of the container to encourage them to move to the surface, then gently scoop or tap them into your pet’s enclosure. For a more automated approach, some hobbyists create a “migration” setup that allows springtails to move into a secondary container on their own.

Incorporating Springtails into Vivariums and Pet Diets

Introduce harvested springtails directly into your pet’s enclosure, where they can burrow into the substrate and continue to reproduce, providing a continuous food source. For vivariums, adding springtails helps establish a bioactive environment that naturally decomposes waste and maintains a healthy ecosystem.

A Note on Co-Cultivation with Other Cultures

It’s crucial to highlight that springtails, while beneficial in many ways, can become pests if they invade Grindal and Whiteworm cultures. Their shared environmental preferences mean that without careful isolation, springtails can outcompete the worms for food, leading to diminished worm productivity. This underscores the importance of strategic separation in the cultivation of diverse live food sources, ensuring that each culture thrives without impacting the others negatively.

Conclusion

Cultivating a springtail culture is a rewarding endeavor that benefits both your pets and their environment. By providing a natural, sustainable food source, you’re enhancing the quality of life for your amphibian, reptile, or fish pets, while engaging in an eco-friendly practice that supports the planet. With patience and care, your springtail culture will thrive, offering endless benefits to your pet’s habitat and diet.
grindal-worms-

Grindal Worms for Fishes, Newts, Salamanders, & Frogs

Grindal worms are a valuable food source for a variety of aquarium fish and amphibians. They’re perfect for a whole bunch of fish and amphibians – think Betta, Corydoras, all sorts of Newts, Salamanders, Frogs, and even those fancy ones like Apistogramma, Killifish, Gourami, Guppy, Angelfish, and Discus.

These worms are a big hit with the young ones (the fry) and the smaller adult fish. They’re packed with nutrients and are super easy for your fish to digest, which means they’re great for keeping your fish healthy and full of energy.

Benefits of Grindal Worms

  • Versatile Diet: Suitable for fish ranging from 1/4 inch to adult size.
  • Efficient Feeding: Fish consume these worms quickly, gaining more nutrients with less energy expenditure.
  • Transition Food: Acts as an intermediate food for fry transitioning from baby brine shrimp or microworms to larger food items like whiteworms.
  • Growth Promotion: Regular feeding with Grindal worms can significantly enhance the growth and development of young fish.

Culturing Grindal Worms

  1. Medium: Use damp coconut fiber or peat moss, about two inches deep, to prevent drying out. Ensure the medium is not too acidic; mix with plain potting soil or add garden lime if needed.
  2. Container: Plastic containers like shoe or sweater boxes are ideal. Ensure they have air holes for ventilation, especially in warmer climates.
  3. Feeding the Worms: Sprinkle a small amount of cereal (e.g., Gerber’s baby cereal) on the medium, add a few drops of water, and avoid overfeeding to prevent mold.
  4. Temperature Control: Grindal worms thrive in a cool, damp environment (70-72°F). In hotter conditions, consider placing the culture in an insulated box with a bottle of frozen water.

Harvesting Techniques

  1. Direct Harvesting: Once worms finish their food, they can be directly harvested and fed to fish.
  2. Glass Sheet Method: Place a glass sheet over the culture medium with some food. Worms will congregate on the glass, making them easy to collect.
  3. Water Separation: Rinse the harvested worms in water to separate them from the medium, then use an eye dropper to feed the fish.

Feeding Fish with Grindal Worms

  • Frequency: Start feeding Grindal worms to fish capable of consuming them, on a daily to every third-day cycle.
  • Observing Growth: Noticeable growth and vitality improvement is often seen in fish regularly fed with Grindal worms.
  • Tank Maintenance: Any residual peat moss from the feeding process can be removed during regular tank cleanings.

Additional Tips

  • Starter Culture: Obtain a starter culture of Grindal worms to begin your own cultivation.
  • Moisture Balance: Maintain a balance in the bedding’s moisture to prevent drying or over-saturation.
  • Feeding Quantity: Develop an eye for the right amount of food; aim for what the worms can consume in a day.

Conclusion

Grindal worms are a fantastic choice for anyone looking to give their fish a nutritious and delicious meal. They’re a breeze to grow and harvest, making them a super addition to your fish-care routine. Plus, they do wonders for the health and growth of your fish. So, give it a whirl, and watch your underwater pals thrive!